How to Do Basic Photo Retouching - 3 Simple Ways
Learn how to do basic photo retouching with Photoshop, GIMP, and another online image editing tool with a step-by-step guide here.
By Jonna Updated on May 22, 2026
What is Basic Photo Retouching?
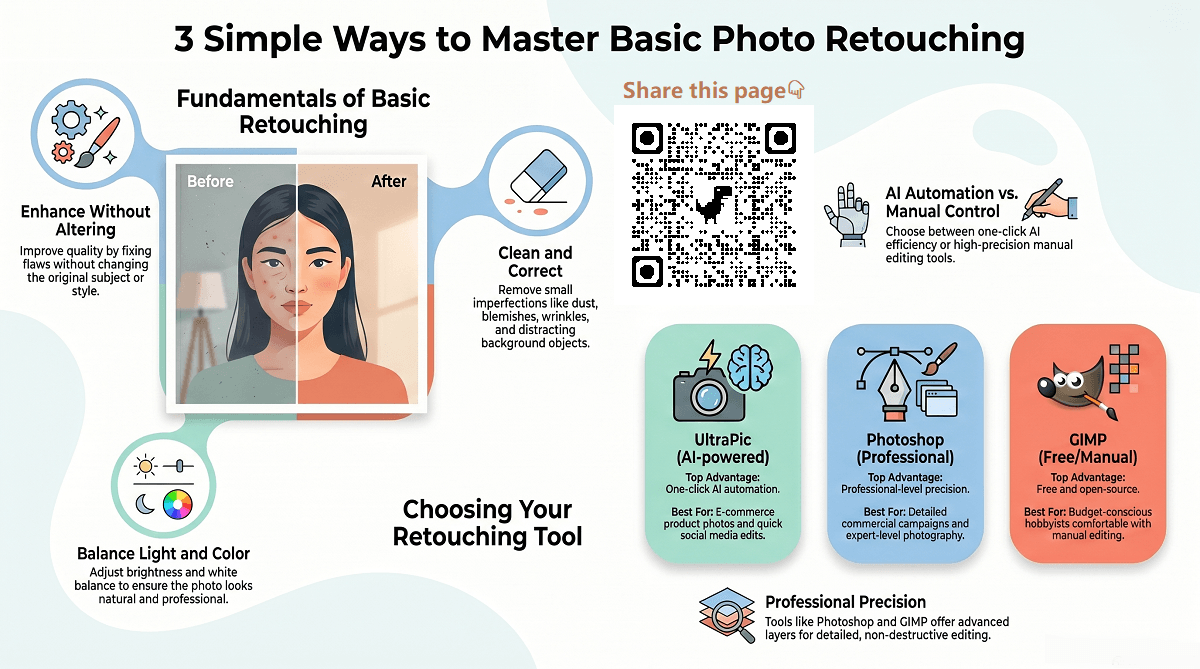
Basic photo retouching is the simple, essential process of improving a photo by fixing small flaws and enhancing overall quality, without heavy editing or changing the original subject, style, or structure. It focuses on cleaning, correcting, and polishing an image to look clearer, neater, and more visually appealing, while keeping the photo natural and realistic. Common basic photo retouching may include:
- Remove small imperfections like dust, spots, dirt, scratches, and blemishes, acne, small wrinkles for portraits, and unwanted tiny marks or lint for product photos.
- Fix lighting and color like adjusting brightness, contrast, and exposure, correct faded, yellowish, or dull colors, and fix white balance to make the photo look natural.
- Basic composition improvements like cropping to remove unnecessary areas, straightening tilted or crooked photos, and removing small distracting background objects.
- Simple enhancements like whitening teeth or brightening eyes gently, smoothing skin slightly, and cleaning up product surfaces to look tidy and professional.
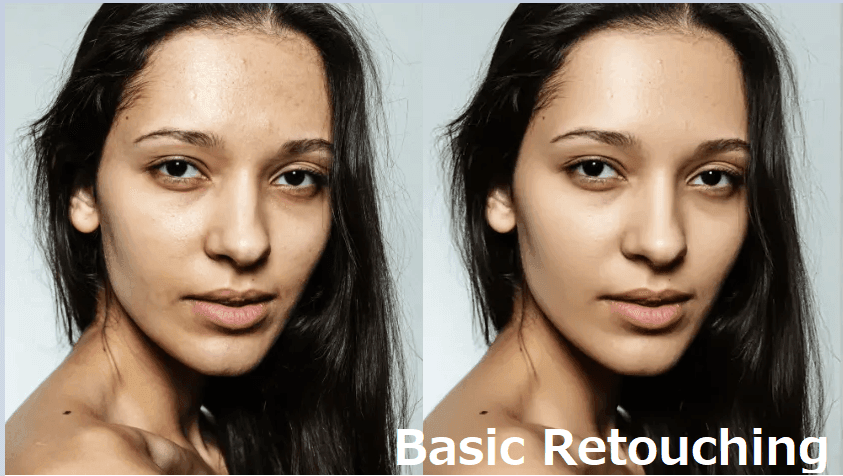
For instance, portrait photographers often rely on basic photo retouching to create polished yet natural-looking images. Product photographers use it to remove distractions and highlight product details, such as cosmetics retouching. Social media creators use it to ensure their images appear professional and engaging, like profile picture retouching. How to choose a basic photo retouching service? Where to get quick basic photo retouching done? In the following content, we will show you 3 methods for basic retouching.
Way 1. Basic Photo Retouching with Free Online Photo Editor - UltraPic
Looking for a powerful yet user-friendly image retouching software for beginners? This is where the free online AI photo editor - UltraPic becomes extremely useful. UltraPic is designed to simplify basic photo retouching by using artificial intelligence to automate many common editing tasks. Instead of manually cloning pixels or adjusting curves, it allows you to upload a photo and 1-click refine it automatically.
Create Studio-Quality Photos with AI
Make images clean and remove imperfections easily.
- Remove messy backgrounds in one click effortlessly
- Enhance and polish images quickly
- Adjust shadow and reflection intelligently
- No design or editing skills needed, instant result
#1. Photo Retouching Functions
UltraPic offers AI Retouching to enhance photos automatically with 5 functions. They are specially designed for amateur photographers and casual users. Simply take a clear product photo with a simple, clean background, and the AI-powered tool will automatically enhance it into a professionally lit, polished image.
- White Background: Automatically removes the original background and replaces it with a clean white backdrop for a professional product presentation, which is useful for e-commerce photography.
- Remove Blemishes: Cleans up dust, scratches, stray hairs, and small imperfections to give products a smooth, refined look.
- Shadow: Adds a natural-looking shadow to create depth and make the product stand out.
- Reflection: Creates a subtle reflection beneath the product for a modern, premium-style finish.
- Remove Watermark & Logo: Removes unwanted text, logos, and watermarks from product images quickly and seamlessly.
#2. How to Do Basic Retouching using UltraPic
Using UltraPic requires only a few simple clicks. The process is designed to be beginner-friendly while still delivering impressive results.
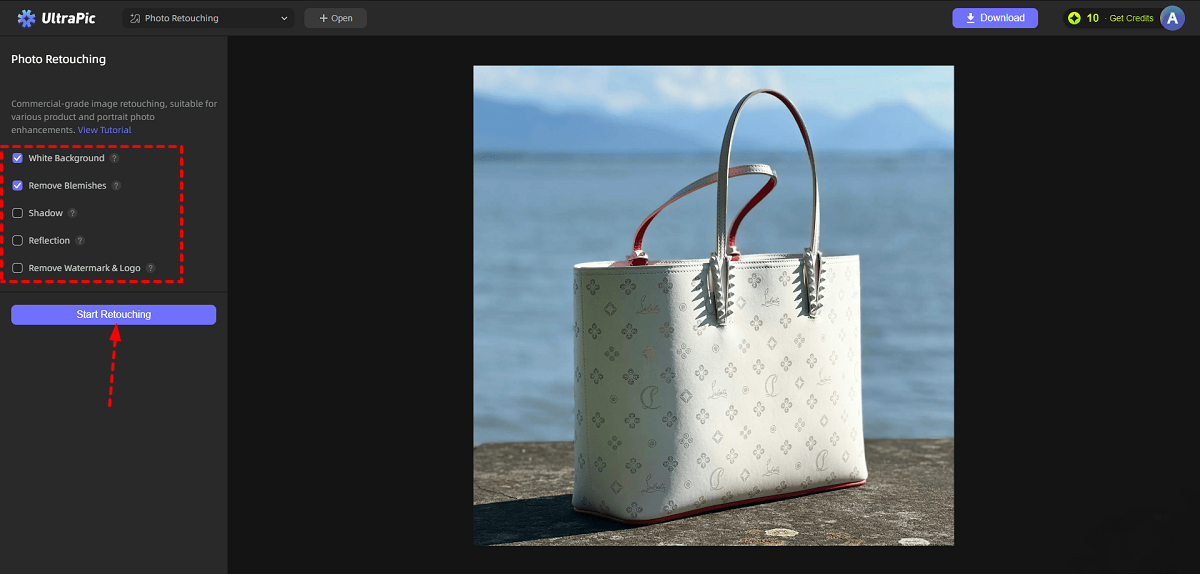
Step 1. Open UltraPic Photo Retouching in your browser and upload the image to retouch.
Step 2. Choose the features that best match your editing goal, then the AI engine analyzes the image and performs corrections automatically. Click on Start Retouching. It also works perfectly for furniture photo retouching, portrait retouching, and so forth.
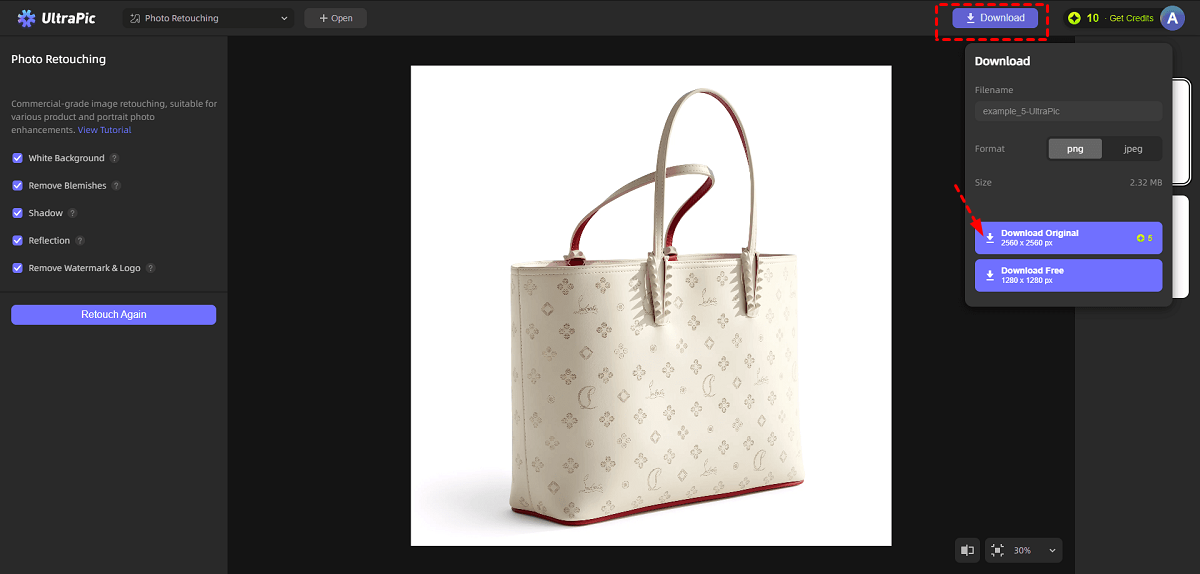
Step 3. And then, hit Download and then Download Original to export the retouched image with high quality.
Way 2. Basic Photo Retouching with Photoshop
Photoshop has been the industry standard for image editing for decades. Its powerful features allow users to perform expert photo retouching, from simple corrections to complex professional retouching operations. But for beginners, Photoshop may seem to be complicated.
#1. Photoshop Photo Retouching Tools
For basic photo retouching in Photoshop, there is a wide variety of tools. Each tool serves a unique purpose, helping users correct imperfections while preserving the natural appearance of the photo. For instance:
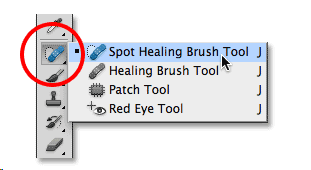
- Spot Healing Brush Tool - This tool quickly removes small blemishes and spots. It automatically blends surrounding pixels to fill the area.
- Healing Brush Tool - Similar to the Spot Healing Brush but with manual control. You can sample a clean area of the image and apply it to the target area.
- Clone Stamp Tool - This tool duplicates pixels from one part of the image to another. It is useful for removing larger distractions.
- Patch Tool - Allows you to select an area of the image and replace it with another area that blends naturally.
- Content-Aware Fill - One of Photoshop’s most powerful features. It intelligently fills removed objects with surrounding textures.
- Dodge Tool - Lightens specific parts of an image to highlight details.
- Burn Tool - Darkens selected areas to add depth and contrast.
- Adjustment Layers - These layers allow you to change brightness, contrast, and color without permanently altering the original image.
- Sharpen Tool - Enhances clarity and detail in important areas such as eyes or textures.
#2. How to Do Basic Retouching in Photoshop
The following is a step-by-step process to perform basic retouching in Photoshop.
Step 1. Launch Photoshop and open your photo, then use Ctrl + J to duplicate the original layer. This protects the original photo and allows you to edit safely.
Step 2. Then, you can do basic Photoshop photo retouching as needed:
1. To remove blemishes: select the Spot Healing Brush Tool, zoom into the image, adjust the brush size, and then click on the blemishes.
2. To fix larger imperfections: Use the Healing Brush Tool or Clone Stamp Tool. The two tools help remove dark circles, wrinkles, and stray hairs.

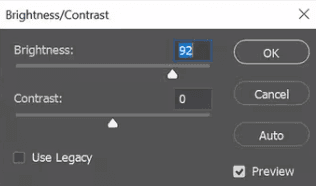
Step 3. You can use Adjustment Layers such as Brightness/Contrast, Levels, or Curves to correct overall lighting.
Step 4. Besides, you can slightly increase brightness or sharpness around the eyes to create focus, and use Dodge and Burn tools subtly to add dimension to the image. Then, apply sharpening carefully to important details while avoiding noise.
Step 5. When the basic retouching in Photoshop is done, you may save the edited image in the desired format for web, print, or social media.
Way 3. Basic Photo Retouching with GIMP
GIMP, which stands for GNU Image Manipulation Program, is a free, open-source image editing software that includes several powerful retouching tools that are commonly used to clean up portraits, fix imperfections, and improve overall image quality.
#1. GIMP Photo Retouching Tools
Some of the most used GIMP retouching tools include:
- Healing Tool - Used to remove blemishes, acne, dust spots, wrinkles, and small distractions by blending nearby pixels naturally.
- Clone Tool - Copies pixels from one area to another. Great for removing larger objects, fixing damaged areas, or duplicating textures.
- Smudge Tool - Softens harsh edges and blends small areas together. Often used carefully for skin smoothing or hair cleanup.
- Dodge and Burn Tools - Useful for adding depth, improving highlights/shadows, and enhancing facial contours.
- Blur/Sharpen Tool - Helps soften rough areas or increase detail and clarity in selected parts of the image.
#2. How to Retouch Photos using GIMP
For how to do photo retouching with GIMP, you can follow the steps below (here we take removing blemishes with the Heal Tool as an example):
Step 1. Launch GIMP, go to File > Open, and select the image you want to retouch.
Step 2. Duplicate the original layer by right-clicking the image layer > choosing Duplicate Layer. This keeps the original photo untouched.
Step 3. Select the Healing Tool, hold Ctrl and click a clean area of skin to sample it, and paint over blemishes or dust spots

🎈The following is a simple comparison of the top 3 methods for basic photo retouching:
|
Tool |
Main Features |
Advantages |
Limitations |
Best Practical Scenarios |
|
UltraPic |
AI-powered retouching, background removal, blemish cleanup, shadow/reflection generation, watermark removal |
Fast, beginner-friendly, one-click automation, no editing skills needed |
Less manual precision for complex edits |
Best for eCommerce product photos, social media creators, quick portrait cleanup, bulk editing, and users needing fast results |
|
Photoshop |
Healing Brush, Clone Stamp, Content-Aware Fill, Adjustment Layers, Dodge/Burn tools |
Professional-level control and precision, advanced customization |
Steeper learning curve, paid software, slower workflow |
Ideal for photographers, designers, beauty retouching, commercial campaigns, and detailed professional editing |
|
GIMP |
Healing Tool, Clone Tool, Smudge Tool, Blur/Sharpen tools |
Free and open-source, powerful manual editing capabilities |
Interface may feel less intuitive, fewer AI automations |
Most practical for budget-conscious users, students, hobby photographers, and users comfortable with manual editing |
Conclusion
Performing basic photo retouching for social media profile pictures, and other photos like removing blemishes, correcting lighting, and sharpening important details, can transform an ordinary image into a polished and professional one.
Photoshop and GIMP provides advanced tools and complete control, making it ideal for photographers and designers who want precision and flexibility. With tools such as the Healing Brush, Clone Stamp, and Adjustment Layers, users can perform detailed retouching while preserving image quality.
UltraPic offers a faster and more accessible solution. AI-powered retouching modes automate many of the most common editing tasks, allowing beginners to improve their photos quickly without learning complex software. Also, it comes with other tools like making any picture transparent, background generation, watermark removal, and so on.