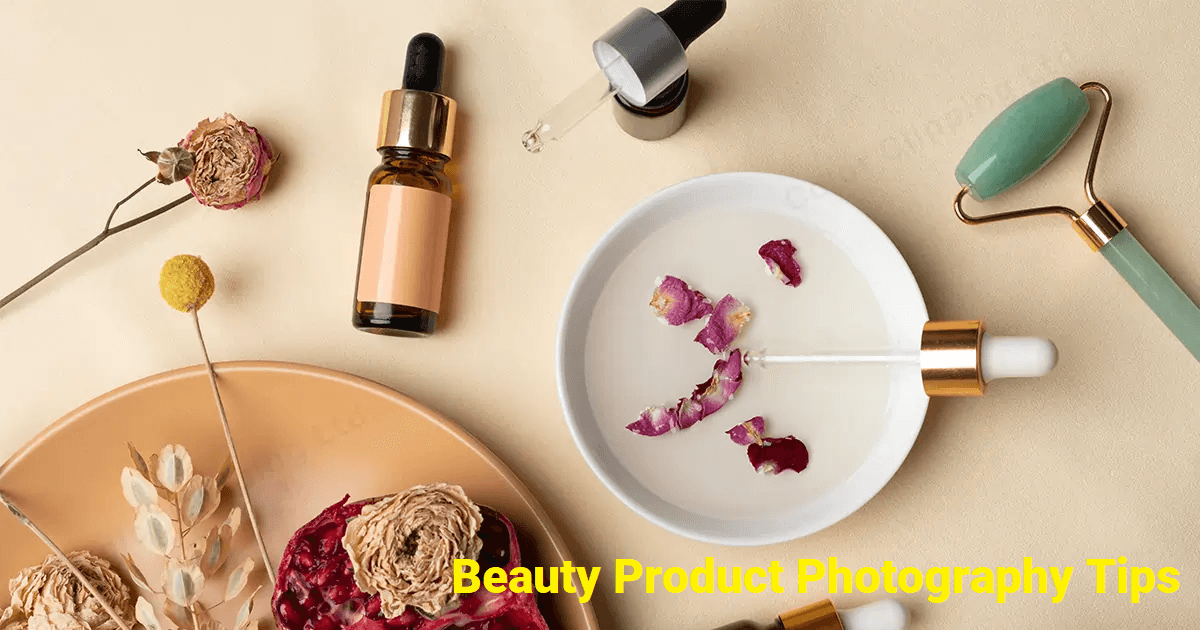
Beauty Products Photoshoot: Photography Tips for Beginners
This post covers some tips you need to know about beauty products photoshoot and how to take product photos that boost sales for your e-commerce brand.
By Jonna Updated on March 30, 2026
Why High-Quality Beauty Product Photography Matters in E-commerce?
When browsing online stores, shoppers cannot touch, smell, or test the product. Images become the only sensory connection between the customer and the item. A well-executed beauty products photoshoot creates trust, communicates quality, and highlights the product’s unique features. High-quality visuals influence several critical aspects of e-commerce success.
- First impressions drive buying decisions: If your product photos look dull, poorly lit, or amateurish, customers may assume the product quality is low as well. On the other hand, well-lit and carefully styled images suggest professionalism and reliability.
- Better images improve conversion rates by increasing engagement. In competitive markets like cosmetic product photography, even small improvements in image quality can significantly influence purchasing decisions.
- Images communicate brand identity: Beauty brands often focus on storytelling. A brand might want to appear luxurious, natural and eco-friendly, minimalist and modern, or fun and colorful.
Important Beauty Products Photoshoot Tips
Creating beautiful product images does not require a large studio or years of experience. What matters most is understanding the fundamentals and practicing simple techniques that highlight the product’s best features. The following beauty/makeup/cosmetic/skincare photoshoot ideas cover essential tools, the shooting process, and editing methods that make your photos stand out.
#1. Essential Tools and Equipment
Before starting a beauty products photoshoot, it helps to gather a few basic tools. While professional photographers often use advanced gear, beginners can achieve excellent results with simple equipment.
Camera or smartphone
Modern smartphones are capable of producing sharp, high-resolution photos.
A DSLR or mirrorless camera offers greater control over exposure and focus.
Either option works well as long as the image is clear and well-lit.
Tripod
- Keeps the camera steady and prevents blurry images.
- Helps maintain consistent angles when photographing multiple products.
- Essential for capturing sharp photos in softer lighting conditions.
Lighting setup
- Natural light from a window is ideal for beginners.
- Soft light reduces harsh shadows and highlights product textures.
- Reflectors or white foam boards can bounce light onto the product.
Clean background
- Neutral backgrounds help the product stand out.
- White, pastel, or light-colored surfaces work especially well for skincare items.
- Minimalistic styling keeps attention on the product itself.
Props and styling elements
- Small props can create lifestyle or thematic images.
- Items like leaves, stones, towels, or flowers often complement beauty products.
- The goal is to enhance the scene without distracting from the product.
#2. Step-by-step Product Photography for Beauty
Once the equipment is ready, the next step is planning and executing the actual makeup/skincare /cosmetic product photography.
Step 1. Plan the concept. Start by deciding the visual style of your shoot. You can consider the target audience, product type, and brand identity.
For example, a luxury serum may require elegant styling, while a vibrant lipstick might benefit from bold colors.
Step 2. Prepare the product. Before photographing, clean the product carefully. Dust, fingerprints, and smudges can easily appear in high-resolution images.
For skincare product photography, small details matter. You can use microfiber cloths, cotton swabs, and compressed air.
Step 3. Set up lighting. Place your primary light source slightly above and to the side of the product. This setup creates natural shadows and highlights.
Soft lighting is particularly important in skincare product photography, as it enhances packaging textures without creating harsh reflections.
Step 4. Arrange the composition. Then, position the product in the center or slightly off-center for a balanced composition. You may also add small props such as leaves, stones, flowers, and fabric textures.
Step 5. Take multiple shots. Don't rely on a single photo. Experiment with different angles during your beauty products photoshoot, such as front view, top-down flat lay, close-up macro shots, lifestyle shots, etc.
#3. Post-Processing Beauty Product Photos (No Skills Needed)
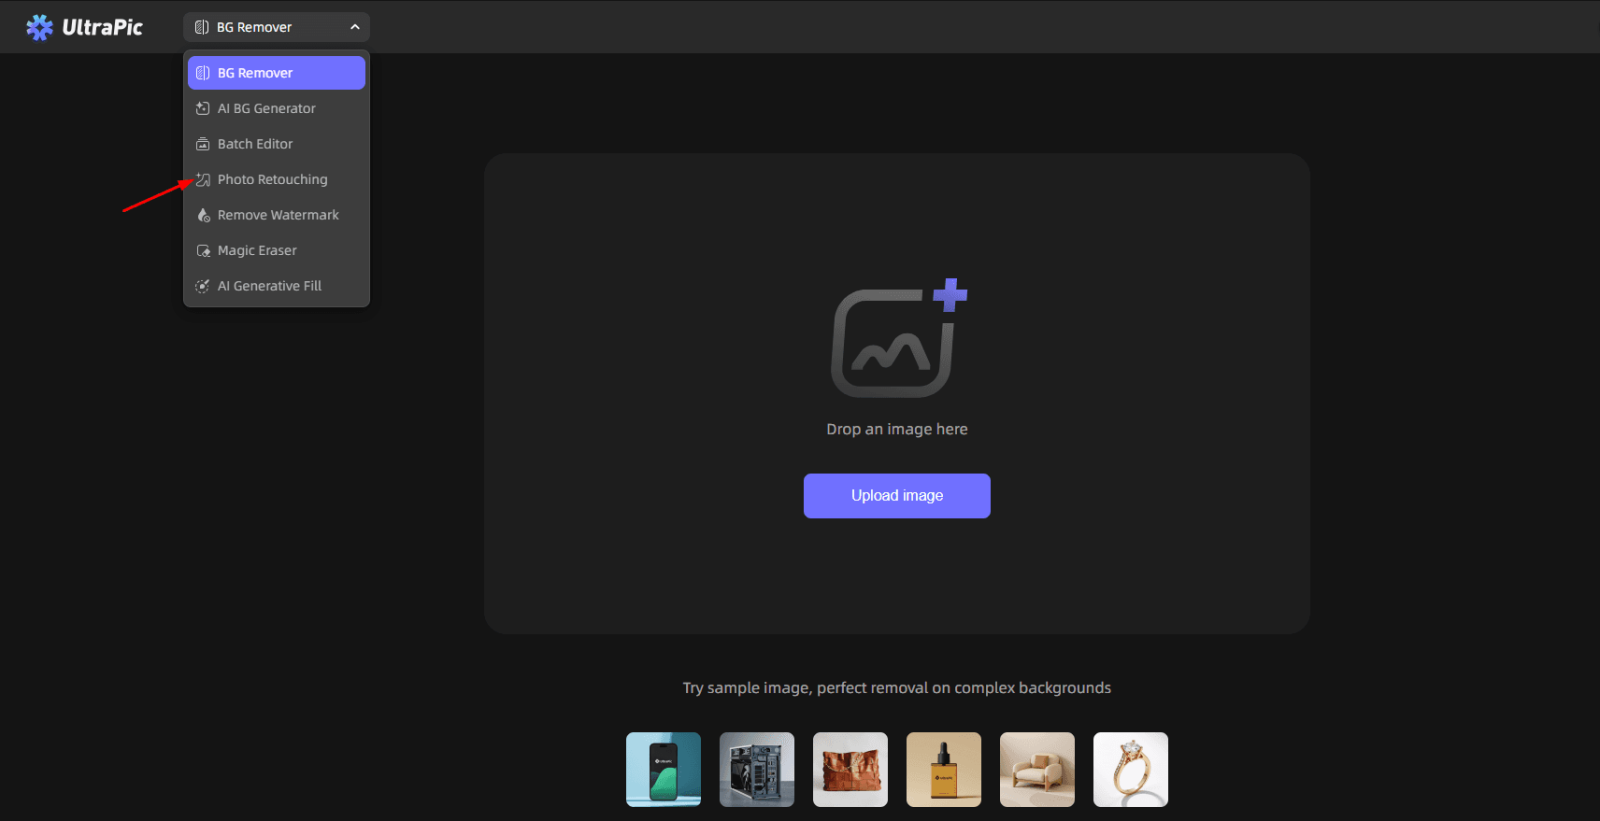
Even professional photographers rarely use images straight out of the camera. Post-processing is an essential step in product photography, including beauty product photoshoots. Editing allows you to refine lighting, remove distractions, and enhance colors. And AI-powered online photo editing tools like UltraPic make this process incredibly simple. This tool focuses on automating common editing tasks that photographers typically spend hours completing manually.
Create Studio-Quality Product Photos with AI
Make product images clean, professional and conversion-ready.
- Remove messy backgrounds in one click effortlessly
- Generate eye-catching custom backdrops for photos
- Boost clicks and sales with better product images
- No design or editing skills needed, instant result
- Automatic background removal - Instantly removes the backdrop, allowing you to create a new background, clean and product-focused, as needed.
- Color enhancement tools - Come with light adjustment like brightness, contrast, highlights, and shadows, so as to retain product colors accurately and vibrantly.
- Photo retouching - One-click AI Retouching and precision-controlled detail retouching to improve picture quality.
- Object removal - Erase unwanted objects from pictures, like removing body hair from someone.
- Batch editing - Allows multiple images to be edited at once, saving time.
- Beginner-friendly interface - The tool is designed for simplicity, making it accessible even to those with no editing experience.
You can just head to the UltraPic photo editor, select BG Remover, AI BG Generator, Photo Retouching, or other tools to begin your makeup product photography now!
FAQs on Beauty Product Photoshoot
#1. Do I need professional equipment to start skincare photoshoots?
No, professional equipment is not necessary to begin photographing beauty products. Many successful beginners start with a smartphone, natural lighting, and a simple background. The key elements are lighting, stability, and composition. A well-lit photo taken with a phone can easily outperform a poorly lit image captured with an expensive camera. Focus on creating soft, even lighting and keeping the product clean and centered.
As skills improve and photography becomes a regular part of your workflow, investing in a dedicated camera and lighting equipment may help expand creative possibilities. However, beginners can achieve excellent results without expensive gear.
#2. How do I take photos of skincare products like moisturizers?
Photographing skincare products requires attention to detail because packaging surfaces are often glossy and reflective. The most effective approach begins with soft lighting. Natural window light diffused through a curtain works extremely well. This creates gentle highlights without producing harsh reflections on the bottle or jar.
Next, ensure the label faces the camera clearly. Slightly tilting the product can reduce glare from reflective surfaces. Taking photos from a slightly elevated angle often helps highlight the shape and texture of the container. Clean backgrounds work best for moisturizers and skincare products. A white or pastel backdrop keeps the focus on the product while creating a fresh, clean aesthetic that aligns with the skincare industry.
#3. How to set up a beauty product photography studio?
A small home studio can work perfectly for a beauty products photoshoot. You only need:
- A table
- Soft lighting
- Background materials
- A tripod
With the right setup, even a small space can produce professional product photography for makeup.
The Final Word
A successful beauty products photoshoot doesn’t require a massive studio or expensive equipment. With thoughtful planning, good lighting, and creative styling, beginners can capture beautiful product images that showcase their brand professionally. In this guide, we explored the essential elements of cosmetic product photography, including equipment selection, shooting techniques, and post-processing methods. Besides, online tools like UltraPic can simplify image editing, allowing beginners to polish the images without needing advanced skills.
Also, this online tool can help you remove watermark from an image quickly and easily. Just give it a try!