How to Use AI Generated Backgrounds Function?
This article aims to help us learn how to use AI Generated Background feature to change the image background easily.
By UltraPic Updated on April 9, 2026
When you want to change the background of an image to a non-solid color, you can use the AI-Generated Background feature to help you optimize the image background.
Note
1. If the edges of the automatic image cropping are imperfect, you can first use the cropping adjustment tool in the cropping tab, and then use AI generation background.
2. Regardless of the original image size, the AI image generation result is fixed at 2560 pixels on the longer side. You can adjust the canvas ratio before image generation, move the product to the desired position and angle, and then proceed with image generation.
Steps for Using the AI Background Generation Feature
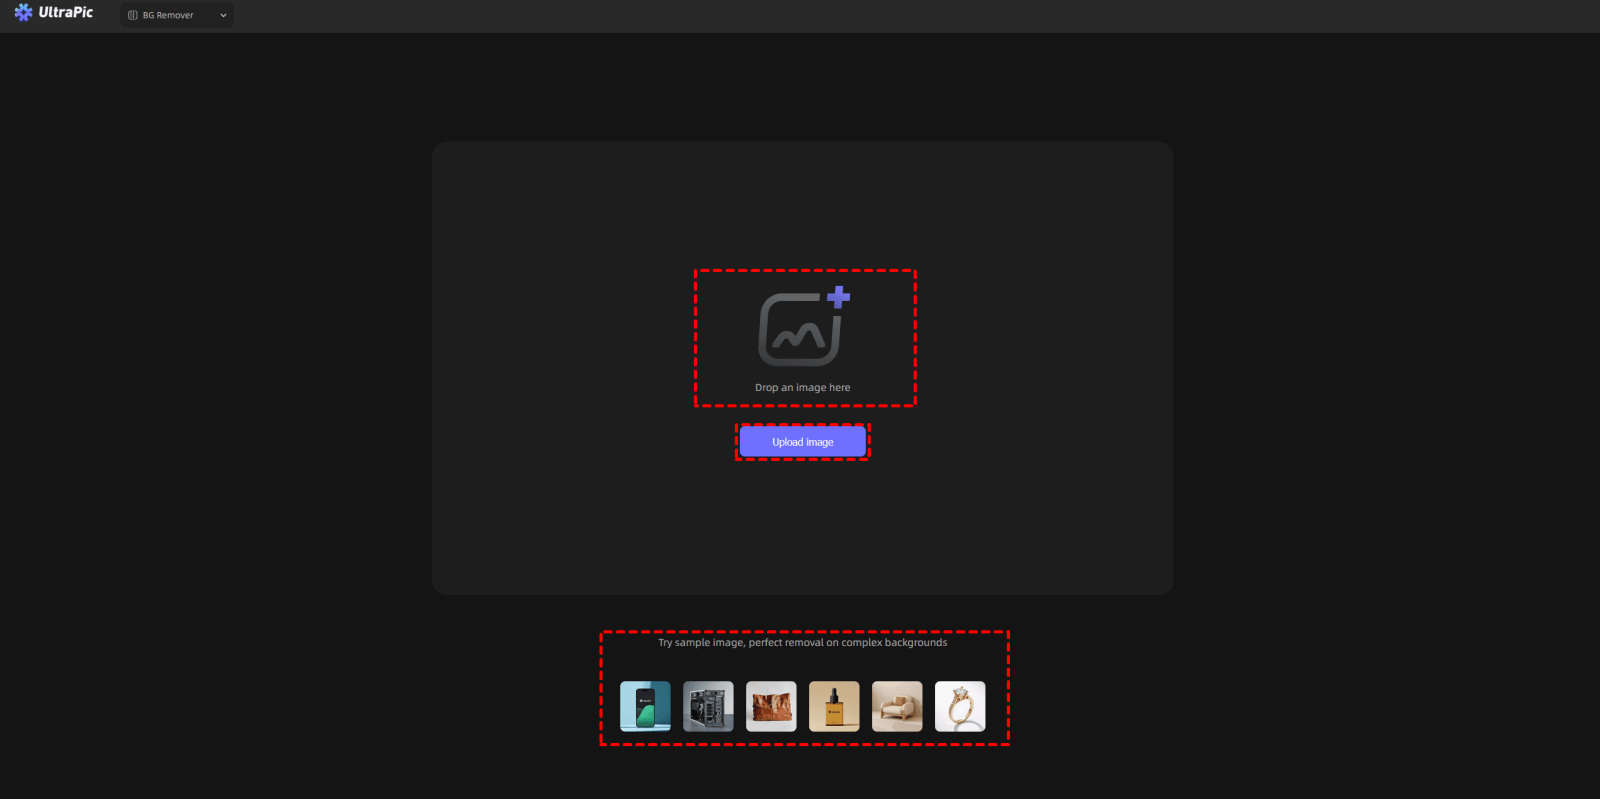
Step 1: Upload the image
Open the UltraPic website, then upload an image that you need to remove the background.
There are three ways to upload an image:
1. Drag & drop: Simply drag your image directly onto the UltraPic main page.
2. Open Image: Click the "Open Image" button to select and upload a file from your device.
3. Sample images: If you don't have an image ready, you can click on one of UltraPic's provided samples to test the features.
Note:
- These formats are supported: png, jpeg, pjp, jpg, webp, jfif, pjepg, bmp, ico.
- Images shot against a clean, uniform background, especially against a white or solid color background, will generally lend themselves to much better image editing (especially background removal and cutouts).
- When importing images, if the long side of the image exceeds 3840 pixels, the program will scale the image proportionally to 3840 pixels on the long side.
Then click “Generate BG” or “AI BG Generator” on the top.

Step 2: Set the canvas ratio
Before you start editing, set the canvas display ratio.
Your options are: Original, 3:4, 4:3, 2:3, 3:2, 9:16, 16:9, and 1:1. The image will be centered automatically after you choose a ratio.
Note: Once a background is generated, you cannot change the canvas ratio. So be sure to confirm your selection first.
Step 3: Change the Image Background
You can change the image's background in three ways:
1. Recommended images: Choose from various pre-designed styles like minimalist, studio, natural, festive, abstract, or desktop.
Note: The diagram on the left shows a good effect that you can directly refer to.
2. Reference: Upload your own saved background image by dragging and dropping it into the software or by clicking "Upload Image".
Note: It is recommended to use images with simple backgrounds and avoid overly complex objects. Additionally, consider the perspective and size relationship between the background and the product, as failure to do so may compromise the final output quality.
3. Prompts: Describe the background you want using text. You can describe the environment, color, texture, and style.
Note: Sensitive keywords (e.g., "blood," "pornography," "violence") are automatically filtered and will not generate any images.
Prompts should describe the environment, style, and other elements in as much detail as possible to enhance the quality of the final image. If you're unsure how to write prompts, you can try the "Suggested Prompt" to refer their format and descriptive approach for optimizing your own prompts.
Step 4: Generate BG
The canvas is divided into two views: “Edit View” and “Preview View”.
Before clicking “Generate BG”
The current canvas is in “Edit View” here.
You can perform “Refine Mask” and “Edit & Adjust” operations:
refine mask: Manually fine-tune the edges of the cutout if they aren't perfect.
Edit & Adjust: Change the image's exposure, color, sharpness, and correct for distortion.
After clicking “Generate BG”
Once you click "Generate BG", the software will automatically create two different images and save them in the "Image History" panel on the right side of your screen.
The canvas will then switch to "Preview View". In this mode, you cannot move or adjust the image.
You can perform “Edit” and “Ultra HD Upscaling” operations:
Edit: Change image exposure, color, sharpness, etc. No distortion correction.
Ultra HD Upscaling: Enlarge the image to a higher resolution (QHD, 2560x2560 pixels) for better quality. When upscaling, other tools will be temporarily disabled.
Tip: This button won't appear for images that have already been enlarged or were originally generated at 2x resolution.
Step 5: Download the image
You have two options for downloading your final image:
1. Direct Download: Click the download icon in the top-right corner of the image in your "Image History." The image will be saved to your browser's default download folder.
2. Custom Download: Click the main "Download" button in the top-right corner of the software to specify the image name, format, and quality before saving it to your computer.
Other Settings
Reset
If you're unhappy with your edits and want to start over, click the “Reset” icon. This will revert all adjustments in that section to their original state, giving you a clean slate.
Image Size
In the lower-right corner of the interface, you can adjust the image size. You can manually change this setting for a more precise view.
Tips
1. Product Images
Prioritize product images with solid-color backgrounds for optimal automatic image masking results.
If automatic masking yields poor results, use the refine mask feature to refine edge processing before generating the background.
2. Consistent Perspective Between Product and Background
For example, when describing a product viewed from above, ensure the prompt aligns with this overhead perspective. Otherwise, the background may appear mismatched with the product.
Most reference images work best for products viewed at eye level.
3. Consistent Size Relationships Between Product and Background
For instance, a small cosmetic item described as placed in a room with surrounding furniture may appear disproportionately large in the background. Close-up cosmetic photos typically exclude numerous room objects. When selecting reference images or crafting prompts, ensure background elements align with the product's current composition to prevent scale discrepancies.
4. Transparent Products
When generating backgrounds for transparent products:
First, it is recommended to use product images shot against solid-color backgrounds.
Second, ensure the primary background color generated does not differ significantly from the original background color in the product image.
For example, a glass bottle photographed against a white background should be placed in a light-colored environment rather than a dark or black background, as this may otherwise result in an unnatural blending effect.
Summary
Transform your images' background in an instant with UltraPic's intelligent AI background generation. This feature streamlines the process of changing backgrounds, making it quicker, more convenient, and remarkably effective. The outcome? Stunning, commercial-grade images that are easy to achieve.


